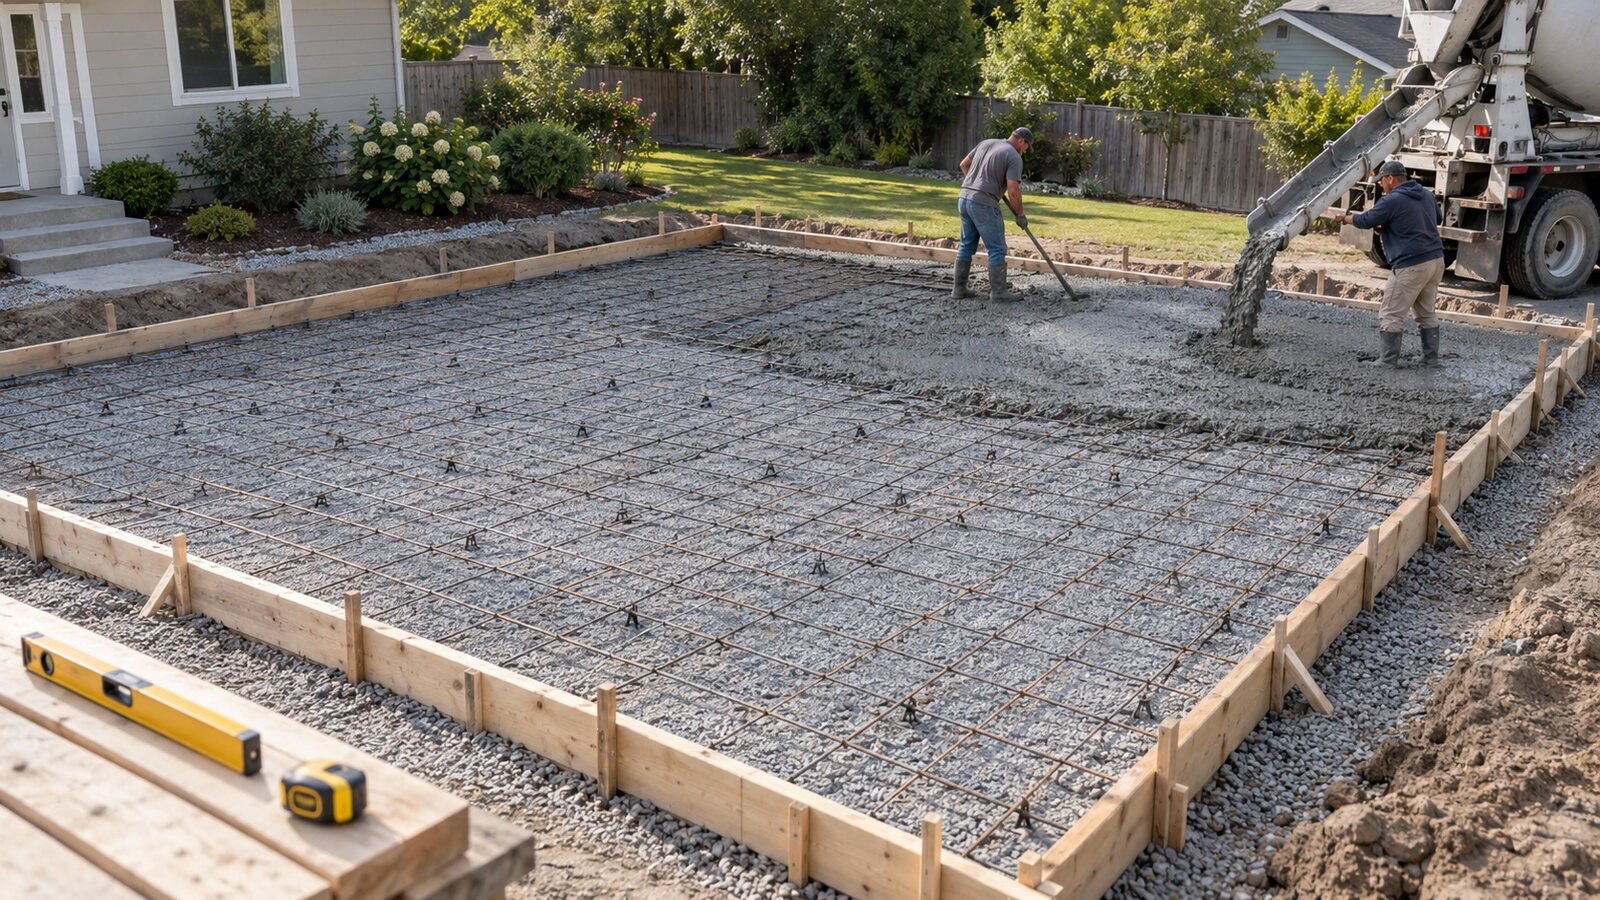
A perfectly uniform 20-foot-by-20-foot slab requires about 4.94 cubic yards at 4 inches, 6.17 cubic yards at 5 inches, or 7.41 cubic yards at 6 inches. Those are theoretical volumes. The quantity placed on a real site can differ because forms are rarely exact, excavation varies, the base may settle, and the design may include thickened edges, footings or steps.
20×20 slab concrete quantity table
| Uniform slab thickness | Theoretical volume | With 5% planning allowance | With 10% planning allowance |
|---|---|---|---|
| 4 inches | 4.94 cu. yd. | 5.19 cu. yd. | 5.43 cu. yd. |
| 5 inches | 6.17 cu. yd. | 6.48 cu. yd. | 6.79 cu. yd. |
| 6 inches | 7.41 cu. yd. | 7.78 cu. yd. | 8.15 cu. yd. |
The allowance columns are planning scenarios, not universal ordering instructions. A supplier may sell in specific increments, and the contractor should set the final order from field measurements and the approved slab details. Too little concrete can interrupt a continuous placement; too much creates disposal and cleanup problems.
Worked calculation for a 4-inch slab
First calculate area: 20 ft. × 20 ft. = 400 square feet. Convert thickness from inches to feet: 4 ÷ 12 = 0.3333 foot. Multiply area by thickness, then convert cubic feet to cubic yards:
400 sq. ft. × 0.3333 ft. = 133.33 cu. ft.
133.33 ÷ 27 = 4.94 cu. yd.
If a project-specific 10% allowance is selected, 4.94 × 1.10 = 5.43 cubic yards. Do not round the slab dimensions before calculating. Enter the measured length, width and design thickness in the Concrete Calculator, then add separate components rather than hiding them in a single guessed percentage.
Low, typical and high-complexity planning cases
- Lower-complexity quantity: square forms close to 20×20, uniform thickness, level prepared base and no separate footings or thickened perimeter.
- Typical residential quantity: small dimensional variation, realistic subgrade tolerances, control joints, reinforcement details and a documented ordering allowance.
- Higher-complexity quantity: thickened edges, post footings, equipment pads, steps, drains, sloped grades, difficult truck access or a design carrying concentrated or vehicle loads.
These cases describe measuring and placement complexity, not structural adequacy or price. Thickness must come from the intended use, site conditions and local requirements. A patio, detached shed base, garage slab and driveway can all be 20×20 while needing different designs.
Calculate thickened edges separately
Suppose the 20×20 slab is 4 inches thick but has a perimeter band that is 12 inches wide and 8 inches deep overall. The base slab calculation already includes 4 inches within that band, so calculate only the additional 4 inches of depth to avoid double counting.
The approximate perimeter band length is 80 feet. Its additional volume is:
80 ft. × 1 ft. wide × (4 ÷ 12 ft. extra depth) = 26.67 cu. ft.
26.67 ÷ 27 = 0.99 additional cu. yd.
The combined theoretical total becomes about 5.93 cubic yards before any project-specific allowance. Corner overlap and exact geometry should be handled from the plans, so this example is for method rather than design. Use the Cubic Yard Calculator for separate rectangular sections and add them only after confirming they do not overlap.
Base preparation changes excavation, not concrete thickness
The aggregate base and concrete slab are separate layers. If the specification calls for 4 inches of compacted base and 4 inches of concrete, do not enter 8 inches as concrete. Calculate aggregate volume independently, accounting for the difference between loose delivery volume and compacted in-place volume as advised by the material supplier.
Remove organic soil and correct soft or disturbed areas before placing base. The USDA Natural Resources Conservation Service notes that mapped soils vary in properties such as seasonal wetness, shrink-swell behavior and depth to bedrock. Its official Web Soil Survey can help with early site screening, but it cannot verify fill, trench backfill or compaction at the slab location.
Joints, reinforcement and curing affect the pour plan
Concrete changes volume as it dries and with temperature. A joint plan should be established before placement so control joints are located and installed at the correct time. Reinforcement may help manage crack behavior, but it does not replace appropriate thickness, uniform support or joints. Chairs or other supports should hold reinforcement at the specified elevation during the pour.
Curing helps concrete retain moisture and temperature conditions needed to develop intended properties. The National Ready Mixed Concrete Association’s Concrete in Practice series provides technical summaries covering ordering, yield, joints, finishing, curing and weather placement. The American Concrete Institute also develops consensus-based concrete standards and technical resources. The project documents and local professional—not an online quantity example—should determine which requirements apply.
Delivery and placement logistics for roughly five to eight yards
A 20×20 placement is large enough that access, crew readiness and timing matter. Confirm whether a ready-mix truck can safely approach the discharge point, who protects the driveway and utilities, how far concrete must travel, and whether a pump or powered placement equipment is needed. A truck’s presence does not guarantee its chute can reach every part of the forms.
Ask the supplier about minimum-load or short-load charges, delivery radius, waiting time, washout rules and how orders are rounded. Confirm who may change the quantity and what happens if site measurements differ. The comparison in Ready-Mix Concrete vs Bags can help frame the labor and scheduling decision without assuming either method is right for every site.
What the slab scope should include—and exclude
A complete scope should identify layout; excavation; removal and disposal; subgrade correction; base material and compacted depth; slab and thickened-section dimensions; concrete mix requirements; reinforcement; vapor retarder when applicable; joints; finish; slope and drainage; curing; testing if specified; access protection; cleanup; and permit or inspection responsibility.
Common exclusions include unsuitable-soil removal, dewatering, utility relocation, retaining walls, plumbing or electrical work, pumps, extra waiting time, winter protection, decorative finish, sealing and landscaping repair. Request unit prices or a written change-order method for uncertain conditions. Our ordering-allowance guide explains why the final buffer should respond to the formwork and site rather than defaulting automatically to one percentage.
Regional and permit caveats
Freeze-thaw exposure, heat, wind, expansive soil and groundwater can affect the design, concrete mixture and construction procedure. Structural loads, vehicle use, walls, roofs, posts, plumbing or electrical work can trigger requirements beyond those for a simple detached flatwork slab.
Permit and inspection rules vary by jurisdiction. Before ordering, ask the local building department whether the project requires plan review, setbacks, frost-protected footings, reinforcement inspection, a vapor retarder, drainage review or other details. Call the utility-location service before excavation and verify easements or homeowners’ association rules.
Frequently asked questions
How many cubic yards are in a 20×20 slab at 4 inches?
The theoretical volume is approximately 4.94 cubic yards. The final order can be higher if field measurements, thickened sections or a justified allowance increase the total.
How much concrete is needed at 5 or 6 inches?
A uniform 5-inch slab is about 6.17 cubic yards, while a uniform 6-inch slab is about 7.41 cubic yards, before allowances or separate structural elements.
Should I automatically add 10%?
No. Ten percent is a common planning scenario, not a rule. Measure the forms, identify thickened areas and discuss tolerances and supplier increments with the responsible contractor and ready-mix supplier.
Does the gravel base count as concrete volume?
No. Calculate the compacted aggregate base separately from the concrete slab. Each material has its own depth, density, compaction and ordering considerations.
Can I choose slab thickness from this quantity table?
No. The table converts an already approved thickness into volume. Intended loads, soil support, climate, drainage and local code determine the slab assembly.
Detailed planning notes for How Much Concrete For 20x20 Slab
The sections below expand this guide so you can move from a quick answer to a more complete homeowner planning process. They focus on measurements, scope, quote comparison and the questions that reduce expensive surprises.
Concrete planning: quantity is only the first step
Concrete math looks simple because volume is length × width × thickness, but field conditions make the practical order more complicated. Forms are rarely perfect, the subgrade may vary slightly, some material can be lost during placement, and ready-mix suppliers often have minimums or ordering increments. A small waste allowance is therefore common, but it should be reasonable for the shape and conditions of the project rather than added blindly.
Thickness is a design decision, not just a cost input. A patio, walkway, driveway and structural slab do not carry the same loads or require the same base preparation. Soil, drainage, freeze-thaw exposure, reinforcement, joints and local code can all affect the final design. The cost of the concrete itself is also only part of the installed project. Excavation, base material, forming, reinforcement, pumping, short-load charges, finishing, curing, access and demolition can materially change the total.
Before ordering, convert your measurements with the Concrete Calculator or Cubic Yard Calculator. For larger pours, confirm the quantity, mix and delivery plan with the supplier or contractor. Technical information from the American Concrete Institute and the National Ready Mixed Concrete Association can help homeowners understand why mix design, placement and curing matter.
Measure twice before you order material
Quantity errors usually come from the inputs, not the formula. Recheck length, width, depth, pitch or surface area and make sure every measurement uses the same unit. For irregular projects, break the area into simple rectangles, triangles or other manageable shapes, calculate them separately, then add the results. This is usually more reliable than forcing a complicated space into one rough measurement.
After calculating the theoretical quantity, think about waste and purchase increments. Cuts, breakage, compaction, spillage, pattern matching and packaging can create a gap between calculated quantity and what you actually need to buy. The correct allowance depends on the material and project. Avoid adding a large arbitrary percentage “just in case”; instead, use supplier packaging, installation guidance and the shape of the project to choose a sensible buffer.
Finally, confirm the order with the supplier or installer when mistakes would be expensive. Ask how the product is sold, whether quantities are rounded, whether there is a minimum order and how returns are handled. Save your measurements and calculation so you can explain the order later and compare it with the contractor's takeoff.
A practical way to use this HomeCostEngine guide
Use this article in three passes. First, understand the cost or quantity drivers so you know what information matters. Second, run the related calculator with your own measurements instead of relying on a national average. Third, compare the result with local supplier prices or written contractor proposals. That sequence turns a general online guide into a project-specific planning tool.
Keep a simple project file with measurements, screenshots, product names, quotes and notes from contractor conversations. When a number changes, update the assumption instead of starting from scratch. This is especially useful when bids arrive weeks apart or when one proposal contains a different material, warranty or scope. A documented baseline helps you notice meaningful differences rather than being distracted by the final total alone.
Remember that HomeCostEngine estimates are for budgeting and education. They do not include every local code requirement, permit rule, hidden condition or labor-market difference, and they are not a substitute for a site inspection. For structural, electrical, plumbing, HVAC, roofing or other work where safety and code compliance matter, verify the final plan with qualified local professionals. If a contractor discovers hidden damage after work begins, ask for photos, an explanation and a written change order before approving additional work whenever practical.
Common mistakes that make online estimates less accurate
- Using living area instead of project area. Roof surface, paintable wall area, flooring area and landscape beds can all differ from the home's advertised square footage.
- Comparing incomplete scopes. Demolition, disposal, preparation, permits, delivery and accessories may be included in one quote and excluded from another.
- Ignoring purchase increments. Bags, cartons, bundles, truckloads and supplier minimums can force the real order above the theoretical calculation.
- Assuming one national price fits every location. Labor rates, access, codes, climate and material availability vary across U.S. markets.
- Choosing only on price. Product specification, workmanship, warranty, schedule and clarity of scope can be as important as the lowest total.
Before you approve the project
Recheck the final measurements and confirm who is responsible for permits, site protection, disposal and cleanup. Make sure important materials are identified by product or performance specification rather than a vague category. Review deposit and progress-payment terms, start and completion expectations, warranty language and the process for unexpected conditions. Keep copies of signed documents and receipts.
If the project is still in the research stage, use the related HomeCostEngine calculators and articles linked throughout this page to test more than one scenario. Changing the project size, material or labor assumption can show which inputs have the biggest effect on the budget. That is usually more useful than chasing one “perfect” average price from the internet.