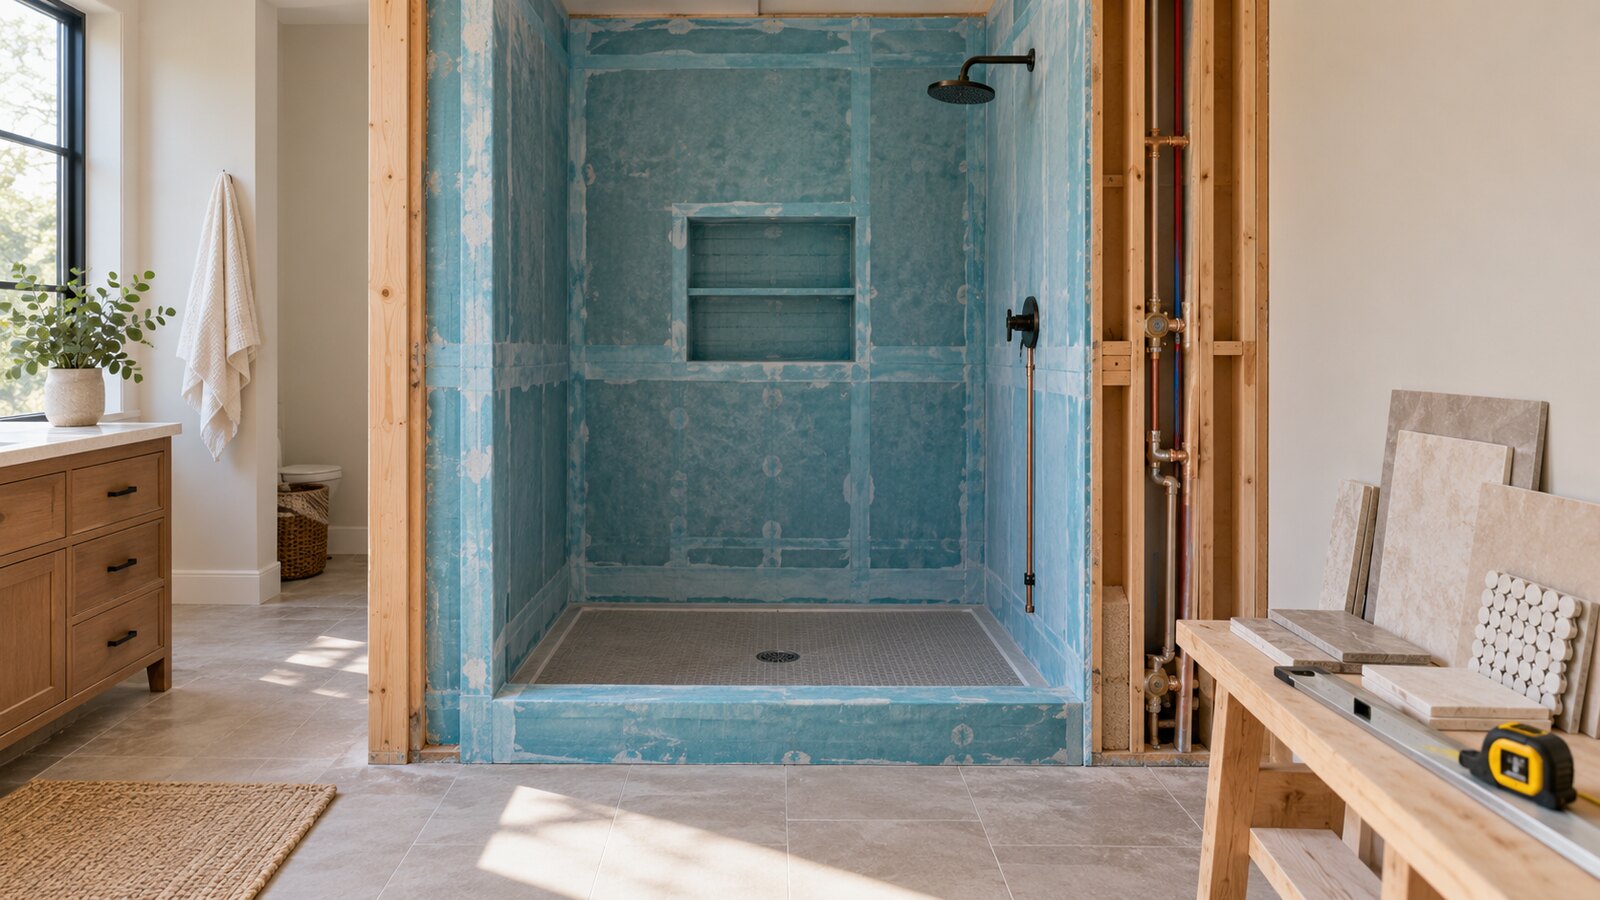
Quick answer: walk-in shower installation cost depends on the complete assembly, not tile area alone. A lower-scope project may keep the drain, valve locations and sound surrounding structure. A typical project replaces the receptor, waterproofing, valve, tile and glass. A higher-scope project may add a curbless transition, drain relocation, structural work, concealed water-damage repair, accessibility features or a full bathroom layout change. Build the budget from documented scope rather than a national average that may omit critical layers.
If the shower is part of a larger renovation, begin with the bathroom remodel cost guide. It helps separate whole-room demolition, ventilation, electrical, vanity and flooring work from the shower itself.
What belongs in a complete shower budget?
| Budget component | Questions to define |
|---|---|
| Demolition | Which walls, receptor, tub, glass and finishes are removed; who hauls debris? |
| Structure and substrate | Are framing, subfloor, wall board, flattening and reinforcement included? |
| Plumbing | Do the drain, trap, supply lines, valve, showerhead or venting change? |
| Waterproofing | Which named system covers the pan, walls, corners, curb, niche and penetrations? |
| Tile and finishes | What area, tile allowance, layout, trim, grout, niche, bench and ceiling scope applies? |
| Glass and fixtures | Is glass framed or frameless; which hardware, valve and accessories are included? |
| Compliance | Who handles permits, inspections, accessibility goals and product documentation? |
Low, typical and high planning logic
Lower scope: the new shower stays in the same footprint, existing drain and supply locations remain, framing and subfloor are sound, and a standard curb and simple glass configuration are used. The proposal still needs a complete waterproofing and finish scope; “same location” does not justify reusing uncertain materials behind the tile.
Typical scope: demolition exposes the full shower area; the contractor installs a new pan or receptor, wall substrate, waterproofing, valve, tile and glass. Minor framing correction, a niche, upgraded fixtures or modest drain work may be included. This is often the most useful working scenario because it treats the shower as a complete system.
Higher scope: the layout changes, the drain moves, the floor is recessed for a curbless entrance, walls move, glass becomes custom, or damage requires framing and subfloor repair. Steam equipment, multiple outlets, complex tile patterns and accessibility work can add specialist labor and coordination. Treat these as named line items, not one vague premium.
Enter locally verified labor, materials and allowances in the Bathroom Remodel Cost Calculator. The tool creates a planning total; it does not replace a site-specific proposal.
Waterproofing is a system, not a line of caulk
Tile and grout are finish surfaces. The shower assembly still needs a continuous water-management strategy at the receptor, walls, seams, corners, penetrations, niche, bench and curb or curbless transition. Ask bidders to identify the manufacturer and method, compatible components, required substrate preparation, drain connection and test procedure. Combining unrelated products without a documented assembly can make responsibility difficult to establish.
Do not compare one proposal that includes full substrate replacement and waterproofing with another that says only “install tile.” The visible finish may be similar while the concealed scope is materially different. Request progress photographs before tile covers the work and retain product and warranty information with the final invoice.
Curbed versus curbless scope
A curb helps contain water while allowing the shower floor to slope toward the drain. A curbless shower removes the step, but the surrounding floor elevations, structure and waterproofing transition must work together. Creating slope may require recessing or modifying the floor, changing drain type or location, and extending waterproofing beyond the shower opening. Doorless layouts also need enough space and spray control.
Curbless does not automatically mean accessible. The U.S. Department of Justice ADA Standards contain dimensional and control requirements for covered facilities, but a private home is not automatically governed by every ADA provision. Homeowners seeking aging-in-place or mobility features should translate their actual needs—entry, turning space, controls, seating, grab-bar backing and slip resistance—into the residential design and confirm applicable local rules.
Worked example: normalize two quote formats
Assume two hypothetical proposals describe the same 60-by-36-inch shower. Quote A is $13,800 and includes demolition, debris removal, a $1,600 tile allowance, plumbing connections, a named waterproofing assembly, standard glass, permit allowance and cleanup. Quote B is $10,900, but tile is owner-supplied, glass is excluded, the permit allowance is $350 and disposal is $450. The homeowner has verified a $1,600 tile selection and a $2,400 glass proposal.
- Quote A normalized known total: $13,800.
- Quote B normalized known total: $10,900 + $1,600 tile + $2,400 glass + $350 permit + $450 disposal = $15,700.
These figures illustrate quote normalization; they are not market-price claims. Quote A is not automatically the better contractor, and neither total covers unapproved concealed repairs. Use the Contractor Quote Comparison Tool to align scope, allowances, exclusions and warranties before evaluating price.
Labor, materials and allowances
A shower project involves demolition, carpentry, plumbing, waterproofing, tile setting, glass and finish work. Separating labor and material categories helps identify where two proposals differ. A tile allowance should specify whether it covers tile only or also trim, setting materials, grout and delivery. A glass allowance should state dimensions, thickness, hardware and installation assumptions.
Model the verified split with the Labor and Material Split Calculator. Keep allowances visible: an allowance is a placeholder for a selection, while a fixed price should describe a defined scope. Neither should silently absorb changed conditions.
Concealed damage and contingency
Previous leakage can damage subfloor, framing or adjacent finishes. Corroded piping, an inadequate drain, out-of-plumb walls or unsupported fixtures may also appear after demolition. Before work, document staining, movement, soft materials and known leak history. The hidden water-leak checklist can help identify symptoms without assuming where the source is.
List each uncertain condition and decide how it will be verified and priced. Then create a separate reserve with the Project Contingency Calculator. More unresolved conditions justify more reserve; a universal percentage does not replace inspection. Require photographs and written approval before concealed-condition work proceeds.
Scope inclusions and exclusions
A complete proposal should address site protection, demolition, hauling, framing correction, substrate, receptor or pan, drain, valve, supply work, waterproofing, tile area and allowance, trim, grout, niche or bench, glass, fixtures, accessories, permit responsibility, inspections, testing, cleanup and warranties.
Common exclusions include structural redesign, extensive rot or mold-related work, hazardous-material testing or abatement, electrical service work, ventilation changes, painting outside the work area, adjacent-floor replacement and temporary bathing facilities. Ask how the contractor handles a selection that exceeds an allowance and how credits are calculated when it costs less.
Regional and permit caveats
Labor availability, building type and adopted requirements vary across the United States. Slab-on-grade construction can make drain relocation different from work over an accessible basement. Condominiums may require building approval, insurance documents, work-hour limits and coordinated water shutoffs. Freeze conditions, local water quality and older housing can influence material and plumbing decisions.
Permit treatment also varies. Plumbing relocation, electrical additions, structural changes and full remodels may require permits or inspections even when a limited finish replacement does not. Ask the local building department what applies to the address and place permit responsibility in the contract.
Water and energy considerations
The U.S. Environmental Protection Agency’s WaterSense program certifies qualifying showerheads for water efficiency and performance. The U.S. Department of Energy also recommends reducing hot-water use as one way to lower water-heating energy. Product selection should still account for household preferences, available pressure, plumbing compatibility and the complete fixture plan. Verify current product certification and any local rebate before purchase.
Homeowner checklist before signing
- Confirm the shower footprint, entry, drain, valve, glass and accessory layout.
- Ask each bidder to price the same demolition and substrate scope.
- Identify the waterproofing assembly and testing responsibility in writing.
- Separate tile, glass and fixture allowances from fixed installation work.
- Confirm how concealed damage will be photographed, priced and approved.
- Verify local permit and inspection responsibility.
- Document warranty coverage for workmanship, waterproofing, glass and fixtures.
- Retain progress photographs, approvals, permit records and product details.
Frequently asked questions
What should a walk-in shower quote include?
It should define demolition, substrate preparation, the named waterproofing system, drain and valve work, tile scope, glass, fixtures, permits, cleanup, warranties and the process for concealed damage.
Does a walk-in shower need a permit?
Requirements vary by jurisdiction and scope. Drain relocation, plumbing changes, electrical work, structural changes and a full bathroom remodel may be treated differently from a limited finish replacement. Confirm locally.
Is a curbless shower always possible?
No. Floor structure, required slope, drain location, waterproofing transitions and adjacent-floor height must be evaluated before committing to the design.
What hidden problems can change the project cost?
Possible conditions include damaged subfloor or framing, previous leaks, inadequate substrate, corroded piping, drain or vent corrections and unexpected electrical or ventilation work.
How should homeowners compare shower quotes?
Normalize every proposal to the same fixture, tile, waterproofing, glass, plumbing and permit scope. Keep allowances and exclusions separate from fixed work before comparing totals.
Primary sources
- U.S. EPA WaterSense — Showerheads
- U.S. Department of Energy — Reduce Hot Water Use for Energy Savings
- U.S. Department of Justice — 2010 ADA Standards for Accessible Design
Detailed planning notes for Walk In Shower Installation Cost
The sections below expand this guide so you can move from a quick answer to a more complete homeowner planning process. They focus on measurements, scope, quote comparison and the questions that reduce expensive surprises.
Turn measurements into a project plan
A calculator is most useful when the inputs are measured carefully and the result is treated as a planning estimate rather than a guaranteed price. Record where each measurement came from, keep units consistent and note any assumptions about waste, labor, delivery or market conditions. That makes it much easier to update the estimate later or compare it with a contractor proposal.
Real projects also include items that pure quantity math cannot see: access, demolition, permits, disposal, site protection, repair of hidden damage and local labor conditions. Use the number from a calculator as a baseline, then add the scope items that apply to the property. When a project affects structure, safety, electrical work, plumbing, combustion equipment or code compliance, use qualified local professionals and applicable permits.
HomeCostEngine provides a library of free calculators for square footage, cubic yards, roofing, concrete, HVAC, paint, flooring and landscape materials. For measurement standards and unit information, the NIST Office of Weights and Measures is an independent reference.
How to turn a cost estimate into a useful budget
Start by separating quantity from price. Quantity answers “how much work or material is involved,” while price answers “what does that amount cost in this market with this scope.” Keeping those two ideas separate makes it easier to understand why contractor quotes differ. If one bid is much higher, look first for a scope difference: better materials, more demolition, difficult access, additional preparation, permit work, longer warranty, cleanup or repairs that another proposal omitted.
Use a range instead of one precise number. Early project estimates contain uncertainty, so a low-to-high planning range is more useful than pretending the project will cost exactly one amount. As you collect local quotes and confirm measurements, narrow the range. Keep a contingency for unknown conditions when the project can expose hidden damage or when site conditions are not fully visible before work starts.
Before signing, compare the payment schedule, exclusions, change-order process, product specifications, warranty responsibilities and cleanup requirements. A quote that is clear about what is not included can be easier to manage than a cheaper quote with vague language. The goal of the estimate is not to pick the lowest number automatically; it is to help you ask better questions and recognize when two proposals are not actually pricing the same job.
A practical way to use this HomeCostEngine guide
Use this article in three passes. First, understand the cost or quantity drivers so you know what information matters. Second, run the related calculator with your own measurements instead of relying on a national average. Third, compare the result with local supplier prices or written contractor proposals. That sequence turns a general online guide into a project-specific planning tool.
Keep a simple project file with measurements, screenshots, product names, quotes and notes from contractor conversations. When a number changes, update the assumption instead of starting from scratch. This is especially useful when bids arrive weeks apart or when one proposal contains a different material, warranty or scope. A documented baseline helps you notice meaningful differences rather than being distracted by the final total alone.
Remember that HomeCostEngine estimates are for budgeting and education. They do not include every local code requirement, permit rule, hidden condition or labor-market difference, and they are not a substitute for a site inspection. For structural, electrical, plumbing, HVAC, roofing or other work where safety and code compliance matter, verify the final plan with qualified local professionals. If a contractor discovers hidden damage after work begins, ask for photos, an explanation and a written change order before approving additional work whenever practical.
Common mistakes that make online estimates less accurate
- Using living area instead of project area. Roof surface, paintable wall area, flooring area and landscape beds can all differ from the home's advertised square footage.
- Comparing incomplete scopes. Demolition, disposal, preparation, permits, delivery and accessories may be included in one quote and excluded from another.
- Ignoring purchase increments. Bags, cartons, bundles, truckloads and supplier minimums can force the real order above the theoretical calculation.
- Assuming one national price fits every location. Labor rates, access, codes, climate and material availability vary across U.S. markets.
- Choosing only on price. Product specification, workmanship, warranty, schedule and clarity of scope can be as important as the lowest total.
Before you approve the project
Recheck the final measurements and confirm who is responsible for permits, site protection, disposal and cleanup. Make sure important materials are identified by product or performance specification rather than a vague category. Review deposit and progress-payment terms, start and completion expectations, warranty language and the process for unexpected conditions. Keep copies of signed documents and receipts.
If the project is still in the research stage, use the related HomeCostEngine calculators and articles linked throughout this page to test more than one scenario. Changing the project size, material or labor assumption can show which inputs have the biggest effect on the budget. That is usually more useful than chasing one “perfect” average price from the internet.